Getting the perfect invisible stitch is very important when sewing. The main feature of this work is the stitches that are invisible from the “face” of the product. However, such a hidden seam can be done either manually using thread and a needle, or on a machine.
- What is a blind seam?
- Kinds
- Purl
- Facial
- Where is it used (table)
- How to choose a thread and needle for a blind stitch
- Preparing to sew
- How to secure thread at the end of a seam
- Step-by-step instructions for making invisible seams by hand
- Hem trousers
- Fold the edges of jeans
- Connect product parts
- Hem the bottom of the skirt
- Attach a patch
- Sew up the hole on the front side
- For repairing soft toys
- Attaching the sleeves of shirts and blouses
- Sewing products using patchwork or quilting technology
- For knitwear and knitwear
- For shoe repair
- Blind stitch on a sewing machine
- Tips for making a blind hem
What is a blind seam?
The answer is hidden in the name itself. A blind seam, when performed using different methods, allows you to connect two parts so that the stitching is not noticeable from the face. Please note that they are usually passed through from the front. A hidden seam helps to finely and exquisitely hem clothes, finish edges, and carefully create children's toys and products with filling.
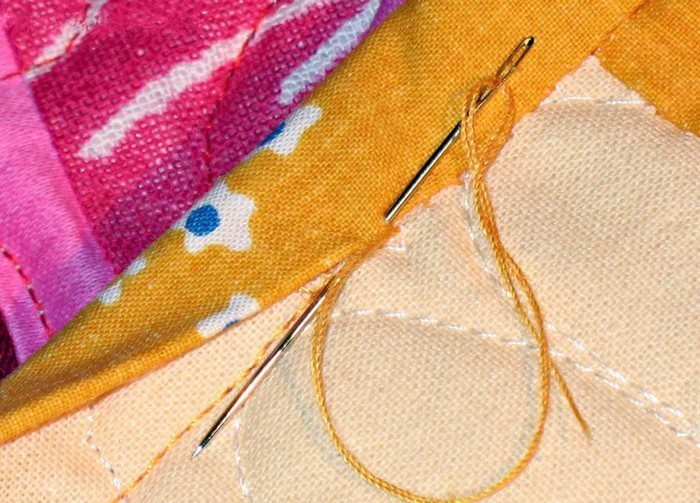
For this manual work you will need the following materials:
- the product itself or the fabrics that need to be sewn together;
- threads in color;
- needles;
- pins;
- scissors.
It is important to understand that the secret method is performed in 1 thread. Also the key point is the exact selection of threads to the color of the fabric. The line should not be highlighted, otherwise the method will no longer be hidden.
Kinds
There are two main methods of blind stitching, but they are similar to each other.
Both types of blind stitch are essential to completing any sewing project, from clothing to accessories, toys to home decor.
Purl
The first is used when hemming the edges of skirts, trousers, thin jackets and other products. The cut edges are folded to the wrong side, and the thread is passed into the folds of the parts. The stitches on both sides are the same width. Using this method it is possible to sew a drawstring and insert an elastic band. For example, to reduce the width of a dress.
Creating a hemming method is as follows:
- Fold the excess fabric to the wrong side 1 or 2 times.
- Inserting a needle and thread in the color of the material, tying a knot.
- Inserting the needle under the folded fabric.
- The stitch is 60-80 millimeters and the output is through the edge of the fold.
- Picking up 1-3 threads on the fabric to which the hem is sewn.
- Inserting the needle into the fold and into the place where the threads came out.
- Stitch the same length.
- Repeat step 5.
- Stitch the same length.
It is important not to pull the thread too hard, otherwise the material will wrinkle and look pulled together.
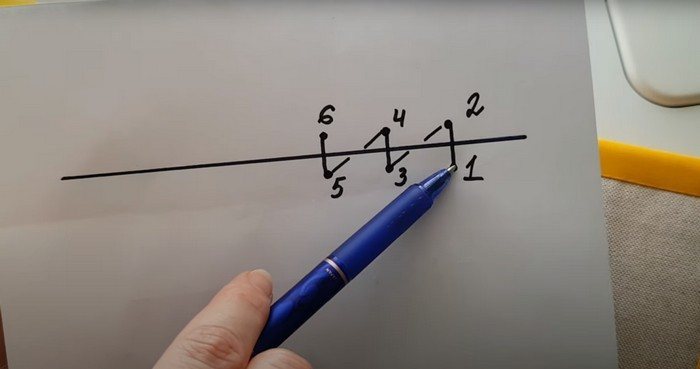
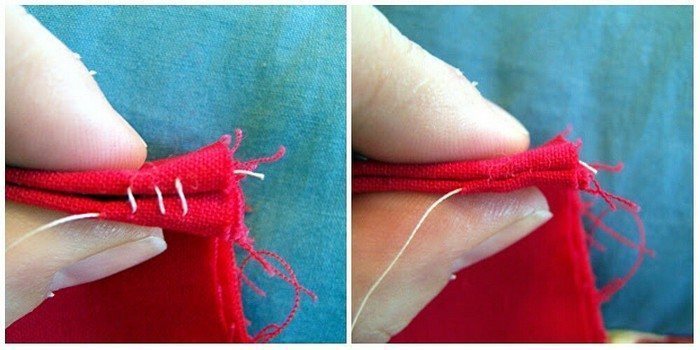
Facial
The second method, often known as ladder or herringbone stitch, is good for embroidering on stuffed animals or other items that need to be joined on the right side of the fabric. American needlewomen call the front seam “overlapping”, that is, “whip stitch”.
Here the seams are even, but completely hidden. Stitches vary in width.
Creating a ladder joint consists of three main steps:
- Inserting the needle into the material from below the hole and withdrawing it after a couple of millimeters. Next you need to take a step forward.
- Inserting the needle from the second side of the slot directly above the exit of the needle, namely perpendicular to the first stitch. Again it is necessary to perform the “forward needle” movement and move the tool to the outer part.
- Pulling up the thread. One seam must be pressed against the second so that the stitching is not visible.
Where is it used (table)
| Usage | Seam type |
| Repairing clothing (e.g. sewing up rips, rips, cuts, discrepancies) | Connecting from the face |
| Creation of plush and other toys (sewing parts of paws, faces, heads, noses, tails) | Connecting from the face |
| Hemming the bottom of products (pants, skirts, sundresses, tops, etc.) | Purl hem |
| Garment processing (sewing sleeves, linings) | Connecting from the face |
| Production of works in the style of patchwork and quilling (folding edges, processing decorative parts) | Purl hem |
How to choose a thread and needle for a blind stitch
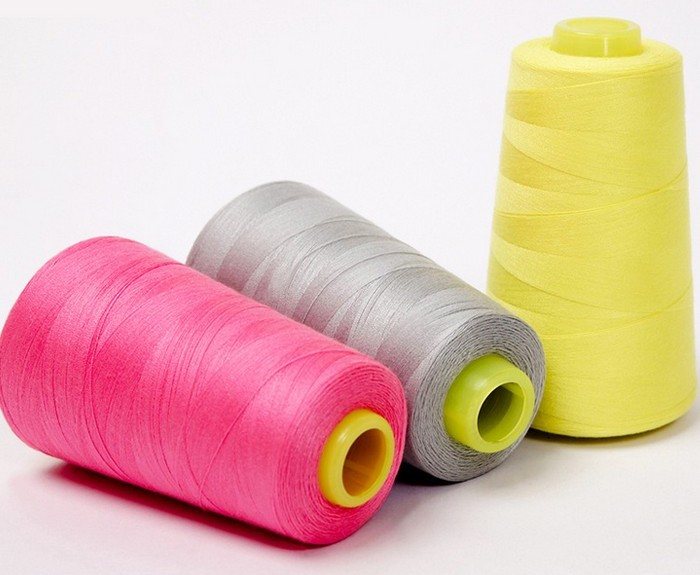
There are special monolithic options with the purpose “for hidden seams”. Despite this, any strong and not very thick threads that match the color of the fabric are suitable for working with hidden equipment. It is also important to choose reels based on the material:
- All polyester or nylon. They are distinguished by good twisting, due to which they have less “fuzz”. The stitching is smooth and beautiful.
- Polyester staple. They have good elasticity. Suitable for working with knitted fabrics.
- Bobbins. These threads are strong, thin, and elastic. They serve for a long time.
- Polyamide or nylon.Used when working with genuine leather. High strength, elastic.
- Silk. Very beautiful. Medium strength. Used for machine embroidery, working with thin fabrics and handicrafts.
Additional requirements:
- Straight and untwisted thread.
- High strength.
- Length up to 55-65 centimeters.
Points to consider when choosing needles:
- Short length. This will allow you to make stitches of the required width.
- Sharpness.
- Subtlety, otherwise you won’t be able to pick up a few threads.
- Narrow ear. If it is wide, the needles will leave marks on thick materials.
- No rust. Oxidation can damage the product, cut the thread or create puffs.
If you choose the wrong tools, the end result will not meet your expectations.
Preparing to sew
When working with the technique of creating a hidden stitch, people put extra strain on their eyes. The technique requires concentration and a lot of free time. It is also necessary to hold the clothing, toy or other item without changing position, otherwise the vertical seam will turn out crooked and visible.
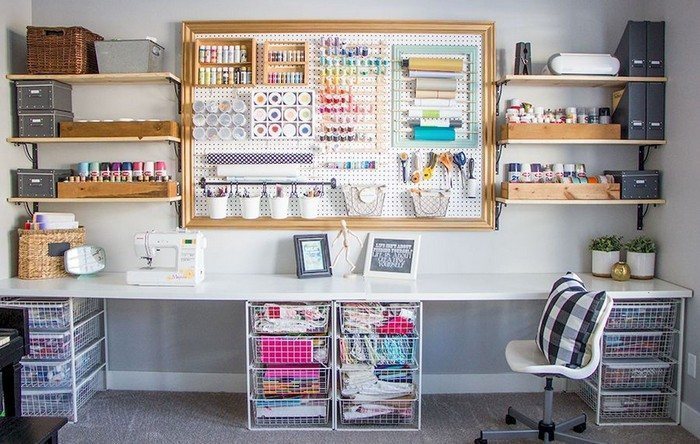
Therefore, you need to start preparing by choosing a comfortable place with good bright lighting. A practical choice is a table with a lamp. This can help preserve vision and posture. However, sitting on a hard chair for a long time is uncomfortable. Then try to set up a work area on a sofa, armchair or sofa next to the lamps.
Organize your “sewing area” so that you can always reach the tools: pins, threads, scissors, chalk.
Install lighting to your left. It is important that the rays hit the entire workspace. It is advisable not to rely on sunlight - it tires the eyes.The ideal option is a convenient combination of artificial and natural lighting.
How to secure thread at the end of a seam
You can secure the thread at the end of the seam using 2 methods: a knot or a tack. To get the first method:
- Sew a small stitch on the wrong side above the last stitch.
- Slowly tighten the thread.
- After a small ring appears, stand up.
- Pass the needle through the loop.
- Tighten until a new ring appears.
- Insert the needle through the second loop.
- Pull the thread tightly until a knot is formed.
To sew the tack, sew 2-3 small stitches using the backstitch technique. This seam is located on top of another and perfectly connects the layers of material.

Step-by-step instructions for making invisible seams by hand
Using simple technology, you can easily and quickly sew, change or repair clothes, toys and other products. A blind seam using your hands is done according to the same principle. However, some points, nuances and changes relate to the place where the secret technique is used.
Hem trousers
Often, after buying pants, people encounter one problem - the product is too long, but otherwise it fits perfectly. There is a solution: sewing trousers with a hidden stitch is as easy as shelling pears.
Before you start, you need to try on your purchase and bend the edge so that the fold point is the desired changed length. In this case, the leg should be straight, not bent. Use soap or chalk to mark a dotted line along the fold. Already at the workplace, draw a straight line along the entire perimeter of the trouser leg, using a ruler.
If the owner of the item is not at hand, then simply take his trousers that are suitable in length and measure their length.
Next, draw another line over the bottom seam. It should be about a couple of centimeters above the bottom. Cut this piece in a circle (that is, you only need to cut one layer of fabric, not two).
Now fold the bottom first in one layer so that the edge reaches the top marked line. It is important to fold the fabric to the inside so that the final result looks neat. Secure with pins on the front side. Fold along the fold line again to the desired length. Re-secure with pins.
Then make a hand stitch using a thin needle and thread in the following color:
- Insert the needle into the fold of the fabric from one part so that the knot is “hidden”.
- Insert the tool into the material from the opposite side. Try to get as close as possible to the area through which the tool was just removed.
- Pull the needle into the inside and after a couple of millimeters bring it out through the fold.
- Repeat until you reach the beginning of the line.
Do not over-tighten the thread, otherwise part of the seam will be pulled on the outside.
Fold the edges of jeans
This method of hemming jeans is distinguished by maintaining the factory bottom seam. Additionally, the method is great for fast-growing children, as unraveling the hand stitching is easy.
- Fold the jeans outward to the desired length.
- Next, take a needle and thread and sew a classic seam or a goat stitch along the entire leg. The stitch length is no more than 1-1.5 centimeters. The shorter, the more reliable.
- Now go a second time down a couple of millimeters, trying to fill in the empty spaces.
- Turn out and iron.
This technique takes no more than 5 minutes.
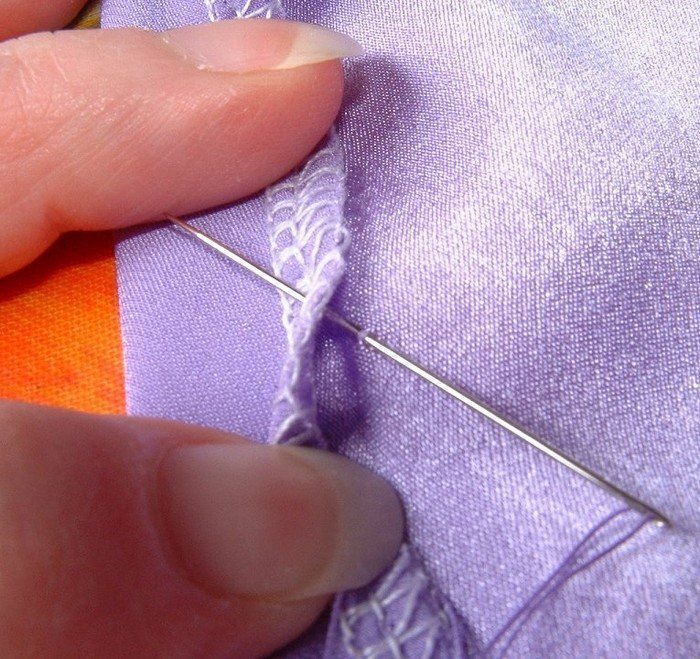
Connect product parts
For a hidden seam connecting the parts of a product, a needle is inserted into the rib from the inside to hide the knot. Stitches are made alternately on both sides perpendicular to each other. Small steps take place along the edge - this is how they become invisible. The smaller the width, the less noticeable the seam. Then just pull the thread and the stitches will tighten.
Hem the bottom of the skirt
If you want to hem a skirt, then a blind stitch is the most useful option. The usual method along the bottom of the product will be too noticeable and rough, especially in strict models. This is usually how classic skirts are sewn.
Instructions:
- The seam allowance sewn on the overlocker needs to be folded and ironed.
- Then it’s better to baste the hem. If you have a lot of experience in sewing, then you can skip this step.
- Fold the pressed seam allowance of the skirt over the wrong side and pin for comfort.
- The blind seam is placed under the overlock line.
- Hemming starts from the side. Use silk threads and thin needles.
- Make the first puncture under the seam, hiding the knot.
- Next, take diagonal steps at a distance of 4-6 millimeters. To do this, grab the top layer of material with a needle, but not all the way through.
- Stitches 3 and 4 are made simultaneously, respecting the length.
- Repeat the previous step.
- At the end of the work, secure the thread by threading a needle through the loop. This will create the first node. Finish the seam with a second knot.
- Cut the thread.
- Iron the stitched bottom of the skirt.
The silk thread should lie freely (do not tighten or loosen too much).
Attach a patch
A patch is a piece of material that is fixed to a product to hide tears. Material – basic fabric or a more durable option.
When using manual attachment technology, the part will be visible from the front side. Therefore, it is advisable to choose a fabric that matches the main one or find a material of similar density.
How to attach a patch:
- Select the fabric and cut out a piece a couple of centimeters larger than the contour of the puncture. The fractional directions of the two materials must coincide.
- Place the piece from the wrong side onto the wrong side of the product.
- Secure with pins.
- Level the patch off the face.
- Fold the edges of the tear into the inner part by 50-70 millimeters.
- Secure with pins.
- Secure the edges with an iron.
- Sew using the blind stitch shown in the video.
Don't forget to iron the finished surface.
Sew up the hole on the front side
Any hole can be masked so that nothing is visible. A small hole is closed as usual with a hidden seam. You won't be able to hide a large hole, so it's better to use a patch.
How to sew a hole in a medium weight garment:
- Pull the thread out of the fabric.
- Thread the needle. Don't tie a knot.
- Quilt from the face of the garment by inserting the tool into the knit stitches. For comfort, equip yourself with a lens.
- Connect the opposite parts.
- Bring the needle to the wrong side, collecting the missing stitches.
- Make the fastening with stitches, not with a knot.
- Once finished, iron from the back to secure.
For maximum inconspicuous stitching of the hole, use a thin (beaded) needle and thread made from chiffon, organza, or discarded nylon tights.
For repairing soft toys
It is impossible to make soft toys without secret stitching.A blind seam for repairing crafts is performed as follows:
- Inserting thread into the needle.
- Tying a knot.
- Inserting a needle into the fold from the inside out so that the knot is hidden.
- Moving the tool to the opposite part.
- Grab a couple of fabric fibers and gently pull the joint together.
- Inserting the needle from the same side on which you started working.
- Grabbing several fibers, withdrawing the instrument by pulling it forward.
- Stitching open space all the way.
Don't forget to secure the threads and trim off any excess parts with scissors.
Attaching the sleeves of shirts and blouses
To perform this processing of a straight sleeve, it is folded to the wrong side along the hem line and hidden stitches are passed from the inside. An invisible seam is placed below the zigzag edge, making the fastening look neat.
Instructions:
- From the “face” of the product, mark the hem line for the sleeve.
- From the inside, trim the allowances of the part of the sleeve stitching that will be needed for the hem.
- Seal the hem allowance at the back. To do this, turn the sleeves inside out and fold the fabric along the fold.
- Sweep it.
- Remove the pins to measure the depth of the hem.
- Draw a line. Cut the unnecessary allowance straight.
- Process the edge with a zigzag and baste the hem 15 millimeters below the processed bottom.
- Fold down the edge of the hem.
- Walk with hidden stitches.
- Iron.
This method works for securing the sleeves of shirts and blouses made from medium-weight materials. For example, on silk fabric the stitching will be noticeable.
Sewing products using patchwork or quilting technology
The invisible stitch is used in quilt making to hand stitch quilt borders and to create a variety of appliqués and embroideries. Using a magic seam, the lower parts of the products are processed using patchwork or quilting technology, turning and decorating.
Hidden stitching helps you create stitches that are barely visible on either side. The seam is laid from the right side to the left, trying to capture no more than one fiber of the fabric and capturing the upper fold of the hem. It is advisable to use silk threads.

For knitwear and knitwear
To perform the technique correctly, start stitching not from the first stitches, but from the third row. Since after completing the seam it is easier to finish the second missing side. The thread remains loose, without a knot.
Performance:
- Insert the needle into the first stitch of the bottom edge, leaving the edge of the thread free.
- Next, pass the needle into the upper loops: from top to bottom in the first and from bottom to top in the second.
- Holding the loops, pull the tool and threads through.
- Return the needle from top to bottom to the same loop you started with. Insert the tool from the bottom up into the loop on the right.
- You should end up with a ring connecting the two pieces.
- Re-thread the tool straight perpendicularly, going into the loop from top to bottom.
- Repeat the steps.
- After finishing the work, remove the needle and make a knot.
The needle needs to have a blunt end. In addition, it is better to cut the thread short, otherwise it will begin to tangle.
For shoe repair
To restore a shoe seam, you need to take a nylon thread “magpie” and a thin hook.
Before you begin, locate the end of the broken seam.
- Insert the hook into the first hole after the break.
- Pierce the leather from above, without catching the lining, otherwise the stitch will not lie well.
- Bend the material and pierce the adjacent hole a second time, where the original seam broke.
- Hook the thread.
- Pierce and pull the hook perpendicular to the second puncture from the opposite side.
- Hook and pull the thread.
- Continue working according to the same principle until the end of the break.
- Tighten the threads.
- Pierce the end of the stitch by touch with the hook from the inside.
- Pull the remaining threads inside with it.
- Tighten again.
- Secure the seam with three knots.
After work, you can go over the cut edges of the thread with a lighter.
Blind stitch on a sewing machine
The special magic foot for a blind stitch has a limiter, the position of which can be adjusted with a screw. There is a twin sister - a model with a "visor".
As a rule, for the invisible technique, lines with a single protrusion (straight - zigzag - straight) are used. Suitable for all types of fabric. Variants in which the straight line is replaced by a small zigzag are used when working with knitwear.
The further the puncture, the more noticeable the processing looks from the front side. Therefore, you can first try the technique on an unnecessary piece of fabric, adjusting the settings.
When preparing for work, iron the hem and turn it back so that only the overcast edge remains.
Then simply run a stitch along the edge.
Tips for making a blind seam
The hidden technique must be done carefully. This is due to the fact that the stitches are made from the face of clothing, crafts or toys. At the same time, working with different types of materials, threads and clothing, needlewomen are faced with important points.
When sewing up a hole in jeans or pants, turn the item inside out. Other types need to be sewn up from the outside.
It is advisable to choose a thread a couple of sizes smaller than recommended for your fabric
To get a truly hidden seam, try to make stitches of the same length and width, so that after pulling the edges together and processing the material, the stitching will come out unnoticeable and even.
If you do not find threads of the same shade, then use black for dark tones of fabrics, and white options for light ones.
The needle needs to be as sharp as possible, not counting when working with wool and knitwear.
We looked at ways to implement hidden technology and situations that require its use. If you honestly follow the instructions and requirements, the seam will come out not just like jewelry, but also quite beautiful. The most important thing is that the line will not be noticeable from the outside!