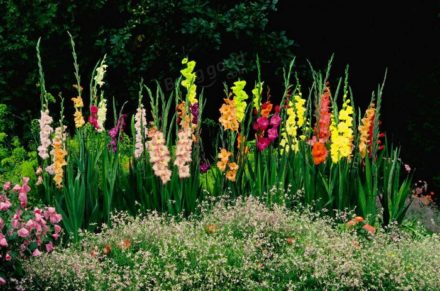
Luxurious slender gladioli belong to bulbous flowers, which means that growing them in the garden has its own specific characteristics. It all starts in early spring, when gladioli planting material, whether purchased or your own, must be prepared for planting in open ground.
Bulb quality assessment
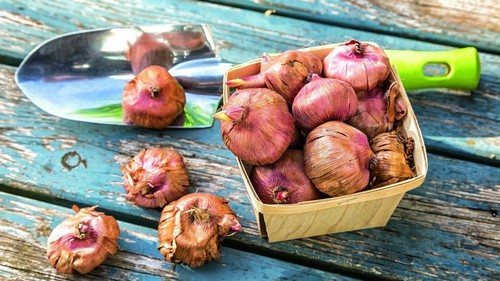
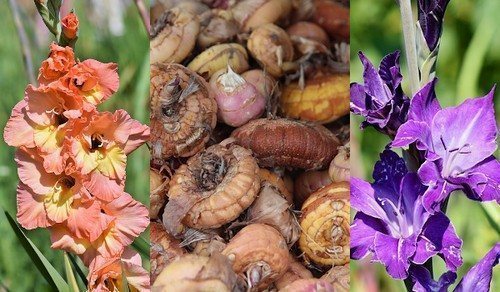
Theoretically, even the most expensive and high-quality gladioli bulbs can be hopelessly damaged by spring, so it is possible to understand how much planting material is available only at the beginning of the season. To do this, the bulbs should be cleaned of exfoliating, easily removed husks and inspected. The following gladioli bulbs are subject to merciless rejection:
- with obvious traces of rot that has taken over most of them;
- clean in appearance, but soft to the touch;
- with traces of extensive mechanical damage;
- significantly damaged by insects.
The optimal size of planting material depends on the specific variety of gladioli, but on average these are bulbs with a diameter of 3–5 cm. Huge size is common for older specimens that produce small flowers on short stems.

Treatment of problem bulbs
Small marks of rot or mechanical damage are easily removable - these places are simply cut off with a sharp knife and treated, smeared with brilliant green or sprinkled with crushed activated carbon.
After 12-24 hours, you can start etching, which is also indicated for healthy bulbs in order to destroy pathogenic bacteria and even a number of pests, such as thrips. For this purpose, you can use:
- Maxim preparation;
- Karbofos solution - 5 g of powder per 2 liters of water;
- Garlic solution - 200 g of vegetable per 2 liters of water.
After any product, gladiolus bulbs are washed in running water and dried.
Germination of bulbs
This important task is undertaken 2-4 weeks before the planned dates for planting gladiolus in the garden, i.e. approximately from April 10 to May 10. There are many germination methods, but most of them have a serious drawback - they provoke root germination.
To germinate the bulbs simply and safely, they should be placed in a low box or plastic container and placed in a place open to diffused sunlight, where there are no drafts, and the temperature is maintained around the clock within +16-18 °C. This method is called vernalization - the spring forces of nature are given the opportunity to "wake up" the life processes in the bulbs. And do not panic if they suddenly turn green in the sun, just like potatoes put aside for sowing - this is a natural and even useful process of accumulating strength in plants, strengthening the immune system.
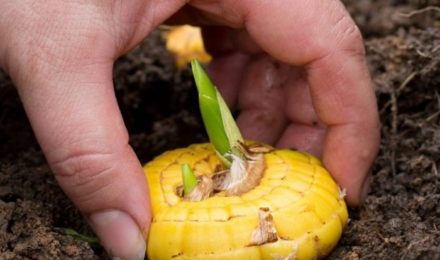
A gladiolus bulb is considered ready for transplanting into the ground when it has acquired sprouts 3-5 cm long and swollen root tubercles or rudiments of roots 3-5 mm long.
It is important not to overexpose gladioli at home - very elongated sprouts are weak and such plants are not able to bloom effectively. And in principle, you can safely break out or trim an overgrown shoot. After all, the bulb has not only a central one, but also 1-2 replacement buds from which healthy shoots can develop.
Increasing the number of bulbs
First of all, you need to increase the number of buds, for which each onion, prepared for germination, is laid upside down or on its side, and then, as soon as the sprouts come out, they are divided into the appropriate number of parts and generously sprinkled with wood ash on the sections. 1–2 weeks after this procedure, the gladioli are ready to be taken out into the flower garden.
But experienced gardeners advise resorting to this method only in the most extreme cases - gladioli “propagated” in this way shoot out arrows with flower stalks 2-3 weeks later, and their buds form smaller.
Saving prematurely sprouted bulbs
This is possible if the storage conditions are violated. It is important to emphasize that gladioli spend only a few days growing long roots. In order to prevent the roots from growing fully and then not damaging them when transferring flowers into the ground, the bulbs should be sent for early germination in pots with sphagnum moss or coconut substrate - this will allow them to be carefully transferred to the planting holes along with a lump that has protectively clung to the roots.
If the bulbs have sprouted a little, you can limit yourself to drying them and moving them to a suitable storage place with a temperature of +1...5 °C. Next, they are prepared for planting as usual.And such gladioli bloom 2 weeks earlier.

To summarize, we can say that there is nothing complicated in preparing to take gladioli bulbs out into the flower garden, and even a novice gardener is quite capable of taking proper care of them.