A bag is a necessary accessory for any woman, the number of which can be unlimited. For each outfit, a specific model is selected to complement the image. But it’s not always possible to find a suitable handbag in a store.
The solution will be an accessory made with your own hands from unnecessary things that you can always find on hand. It will be possible not only to update your wardrobe, but also to significantly save your budget.
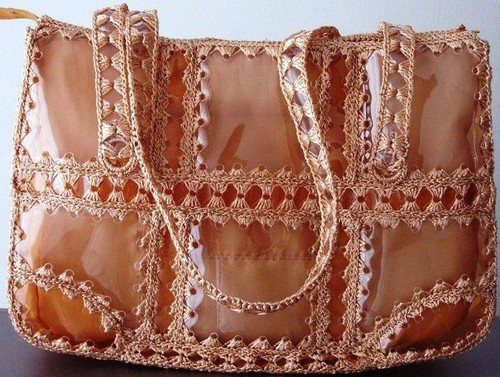
Plastic bag
Few people realize that you can make a beautiful accessory from ordinary plastic bottles. This can be either a small cosmetic bag or a spacious beach bag.
In addition to bottles, the number of which depends on the size of the future product, you will need the following materials and tools:
- polypropylene thread;
- hook;
- awl;
- scissors;
- fabric for lining;
- hammer;
- cardboard.
Before starting work, all bottles must be thoroughly washed, any stickers and labels removed, and the neck and bottom cut off. Cut the resulting cylinder and place it under a press to straighten it.
Then the work is performed in the following order:
- Cut out squares measuring 5x5 cm from plastic. The number of blanks depends on the size of the product. For a voluminous accessory you will need about 35-40 squares.
- Make holes along the perimeter of the squares with an awl at a distance of 3 mm from the edge and from each other.
- Cut the corners of the blanks with scissors or burn them with a burning candle.
- Inserting the hook into the prepared holes, tie the squares, making two double crochets with polypropylene thread.If the holes are too large, you can thread a satin ribbon through them.
- Connect the blanks together, making the front and back sides of the bag, sides, and bottom.
- Sew all the elements together, tying them along the top with 2-3 rows of single crochets.
- Cut out a lining from waterproof fabric. You can additionally cut out a pocket along the length of the product and sew it to the inside of the lining.
- Turn the bag inside out, attach the lining to the bottom and sides of the product, stitching by hand. To make the bottom durable, you can place a piece of thick cardboard between the lining and the plastic base.
- Make a handle by connecting several short strips with superglue and sew it to the bag.
Looking at the finished accessory, few would guess that plastic bottles were used for production.
By the way, you don’t have to throw away the cut off bottoms of bottles, but make a cosmetic bag out of them. To do this, just punch holes along the top of the bottoms and sew on a zipper.
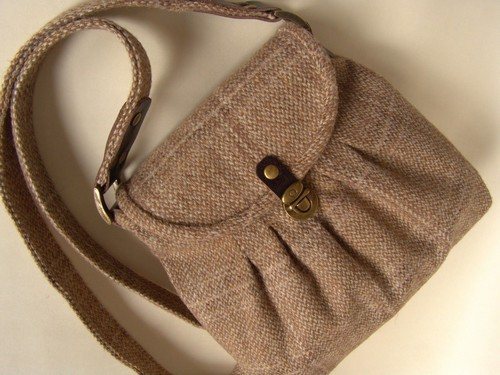
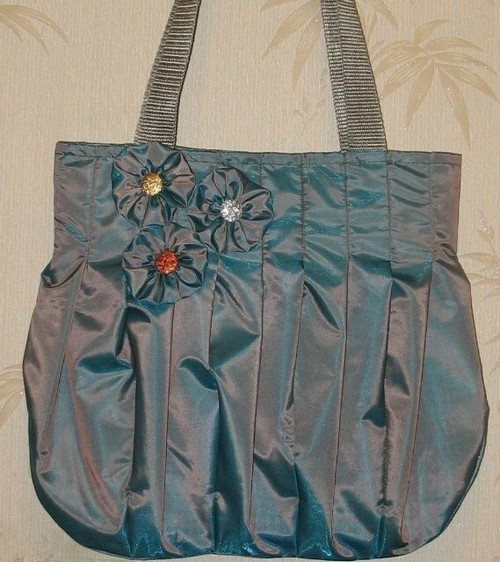
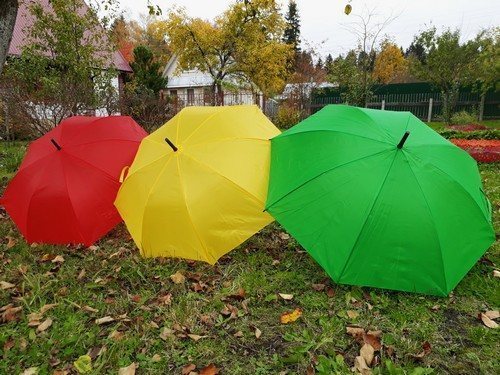
Umbrella bag
An old broken umbrella can be found in any home. Every woman can make a fashion accessory out of it.
To work you need to prepare:
- sewing machine;
- scissors;
- lining fabric;
- pins, threads;
- lightning;
- ruler;
- pen chain.
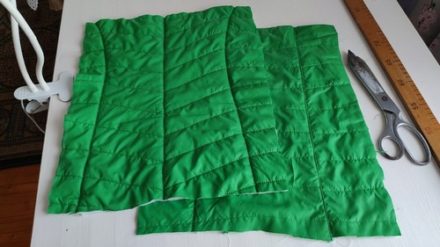
Having prepared everything you need, you need to properly process the workpiece. Carefully tear the fabric away from the frame, wash and iron. There is usually a seam running along the edge of the umbrella that will need to be trimmed.
Having laid out the workpiece on the table, draw a circle with a radius of 9-10 cm with a compass and cut out a circle. 7-8 cm is set aside from the edge of the workpiece, a strip is cut off, which can later be used for finishing.
The next step is assembling the product:
- Folds are marked, the number of which depends on the number of wedges. It is recommended to make 2 folds in each section.
- The folds are pinned or basted, adjusting the width of the product due to the depth of the gathers.
- Attach the folds using a machine, making seams along the top and bottom of the gathers, then smooth them with an iron.
- Sew the bottom edge of the product, rounding it at the sides. Excess fabric is trimmed off.
Handles made of a chain or strap are attached to the assembled accessory. From the cut strips, a facing is constructed with a length equal to the length of the top of the product, fixing it with double tape. Two strips are attached to the edges of the product, to which a zipper is attached.
The final stage is cutting out the lining. To do this, apply the bag to a piece of fabric, outline the silhouette with chalk and cut it out, slightly widening towards the bottom. Pockets are sewn to the inside of the lining. The lining parts are connected to each other using a machine seam. The bag is turned inside out and a lining, previously attached to the facing, is sewn onto it.
The finished product is decorated with decorative elements. You can use the circle that was cut at the beginning. To do this, you just need to thread a thread along the edge of the circle, pull it off and secure it. Sew a large bead or button into the center.
The unusual material of the umbrella will make the bag stylish and bright, and the durable fabric will withstand any load, preventing the contents from getting wet even in pouring rain.
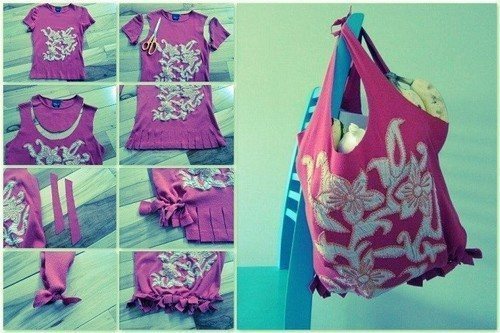
Stylish accessory from a summer T-shirt
An old summer tank top or T-shirt can easily be turned into a stylish shopping bag. For this you will need scissors, thread, and a sewing machine.
The neck and sleeves of the T-shirt are cut off, leaving the T-shirt in its original form.
After cutting off all the labels, turn the T-shirt inside out.
Then you can proceed in two ways:
- Having measured the desired size of the product, insert an elastic band and cut off the bottom.
- Fold the bottom edges, sewing them on a machine along the bottom edge and in the middle with a vertical seam. You will get 2 pockets on each side.
The finished product is turned right side out. The straps of the T-shirt will replace the handles. The bag can be used for shopping, trips out of town, and trips to the beach.
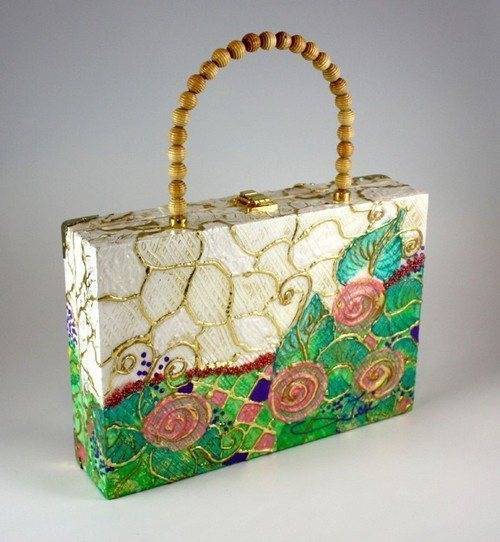
Clutch out of the box
Every day, many boxes of milk, juice, tea are thrown away, without even suspecting that they can be used to make a fashionable clutch handbag.
To do this you need to prepare:
- 2 boxes;
- satin fabric;
- glue;
- rhinestones, beads;
- chain;
- awl;
- scissors.
A lining is made from one box:
- The box is cut so that there are 5 rectangles: three running one after the other and two on the sides.
- The cardboard pattern is applied to the fabric, traced with chalk, leaving 1 cm for the seams.
- Having cut out the fabric blank, cut off the corners. Lubricate the edges of the cardboard with glue, gluing the fabric.
The finished lining is inserted inside the second box. Before fixing the lining with glue, attach a loop of elastic cord to the top. Using an awl, holes are made on the sides of the box for the handle and a chain is attached. The surface of the clutch is decorated with rhinestones, and a button or bead is sewn into the center, which will replace the clasp.
You will get an unusual clutch for cosmetics, keys and other small things.
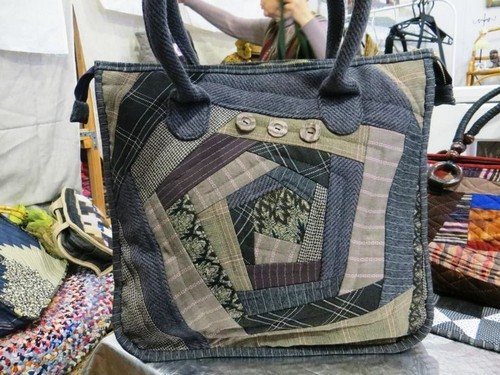
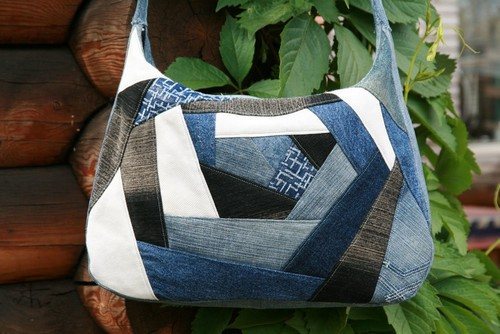
Patchwork bag made from old jeans
In every woman's wardrobe there are jeans lying around.And if you have several pairs of old denim trousers in different shades, you can create a fashionable patchwork bag. An old unnecessary skirt will also come in handy for lining.
Before starting work, you need to prepare a paper sketch on which to indicate where and what color the flaps will be located.
Cut two squares of the required size from the lining fabric. The same blanks are made for the base on which flaps of denim are sewn. Then, with a pencil, draw straight lines along which the seam will pass, stitch all the flaps or sew them on by hand with a fine stitch.
The second half of the product is also made. A lining is attached to the finished workpieces, starting processing from the top edge.
The bag is sewn in such a way that there is an unstitched piece left for turning the product inside out. Having turned the product inside out, sew up the remaining section, tucking it in at the corners.
To make the bottom more stable, you can use plastic, securing it from the inside. Then the zipper and handles are sewn on.
The result is an original patchwork bag, which does not require much time and effort to create.
Making a bag with your own hands is not difficult. All you have to do is choose a model, and there will always be available tools. And the resulting accessory will be one and only.


WILL SOMEONE REALLY WEAR THIS??