Winter preparations are stored in glass jars. And every housewife strives to preserve it until the end of winter, or even until next summer. Proper sterilization of jars is of great importance here.
Why do you need to sterilize jars?
The procedure must be carried out to clean the surface of bacteria and germs. If this is not done, microorganisms will actively develop in the nutrient medium.
A month after sealing the product, the fermentation process will begin and the lid will swell. As a result, the product will deteriorate.
How to prepare jars for the sterilization process
Check the jars for cracks, damage, corrosion and chips. If there are defects, it is better not to take such containers.
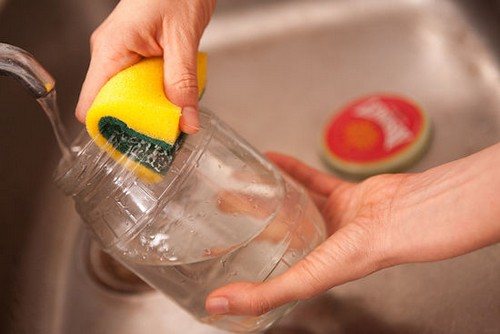
Rinse the jars with a clean, new sponge an hour before sterilization. This can be done using:
- Soda.
- Laundry soap.
- Citric acid.
- Mustard powder.
Rinse them with cold water, wipe with a towel (be sure to dry) and leave to dry.
Methods for sterilizing empty jars
Don't understand how to sterilize jars at home? What will it take? We have collected several methods for you and described the process of each.
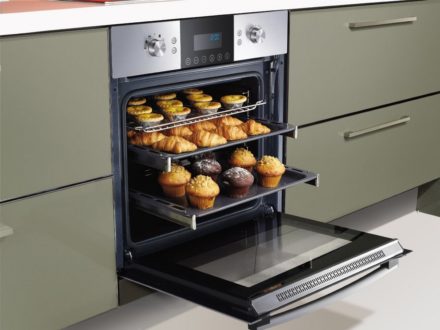
In an electric oven
We heat the unit to 100 degrees. Take the bottom rack and place the maximum number of cans on it. You can place the containers horizontally.
We put everything in the electric oven. Let stand for 25 minutes.
Turn off the oven and leave the containers for a couple of minutes to cool.
We take out the vessels with a warm towel.
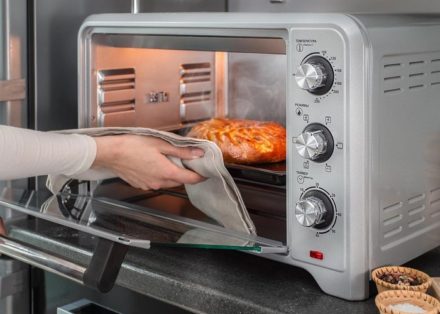
In a gas oven
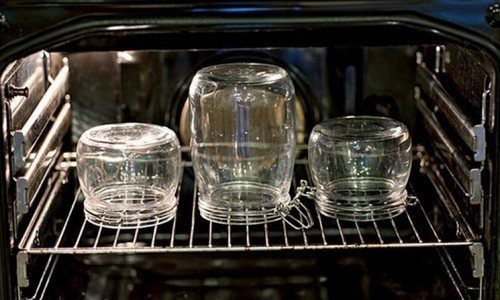
Place the jars on the wire rack at a distance of 4-5 mm from each other. We put the dry ones upside down, and the wet ones downwards. Turn on the oven to low heat. Over 3 minutes, gradually raise the temperature to 120 degrees Celsius.
Let the containers stand for 20 minutes. Turn off the gas oven. We wait 5 minutes.
Putting a mitten or towel on your hand, we take out the containers.
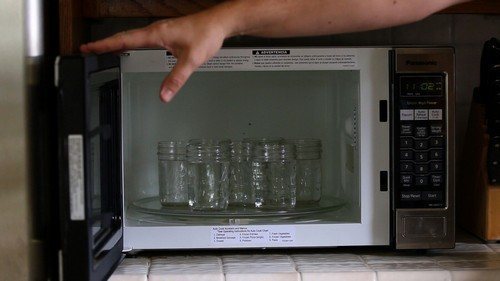
In the microwave
The method is suitable for small sterilizations, because the average microwave oven fits one 3 liters. vessel.
First, rinse the container generously with a soda solution (dilute 1 tablespoon of soda in 1 liter of water) using a sponge. Pour 1-2 cm of water to the bottom. In 3 l. The vessel needs to be filled with a glass (250 ml) of water. Place the container in the microwave.
If you are sterilizing several jars at once, leave a few millimeters of space between them in the microwave. Containers from 2 l. You can transfer them to a barrel by pouring 0.5 cups of water into them.
With a power of 700 W or more, we sterilize 1 liter. vessel 3 minutes. The larger the volume and number of containers, the longer it will take. For 3 l. jars sterilization time – 7 minutes.
The water should boil and the inside of the jar should be covered with large drops. After boiling, wait 3 minutes.
We take the containers out of the microwave, drain the water and place the neck down on a clean, dry towel.
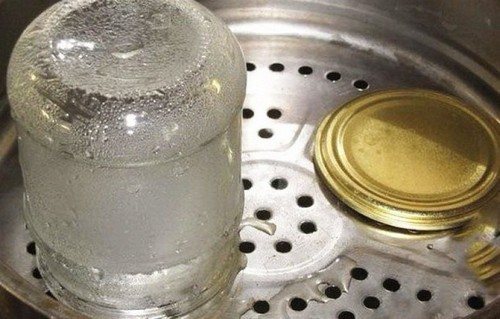
In a slow cooker
Pour 0.5 liters into the multicooker. water. Place a lid on the liquid. We install a double boiler, and place the jar on it with the neck down. Turn on the device in “steam” mode for 10 minutes. The duration of the procedure does not depend on the volume and number of containers.
At the end of the specified time, turn off the device. Let the jar cool and remove.
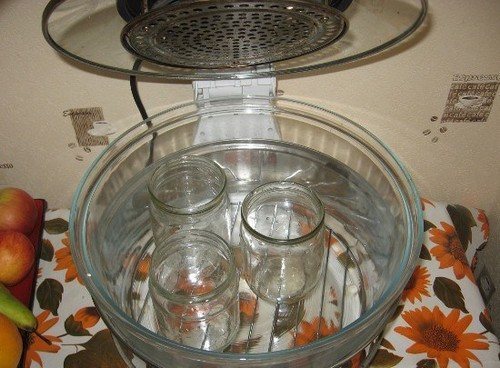
Using an air fryer
Place the lowest rack in the air fryer. We install as many cans as can fit. There should be space between them.
Set the temperature to 150-180 degrees Celsius. For cans smaller than 1 liter. Set the timer for 8 minutes. We sterilize larger containers for 15 minutes.
In water
Fill the enamel bucket halfway with clean water. We put it on fire. Place all the jars in water. Bring the liquid to a boil.
Boil the vessels for 6-7 minutes. We take it out and put it bottom down.
Ferry
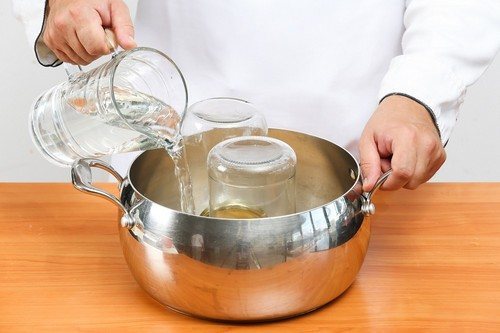
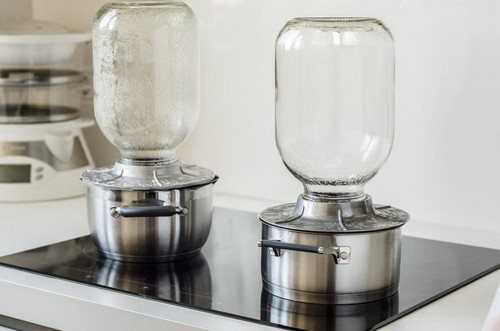
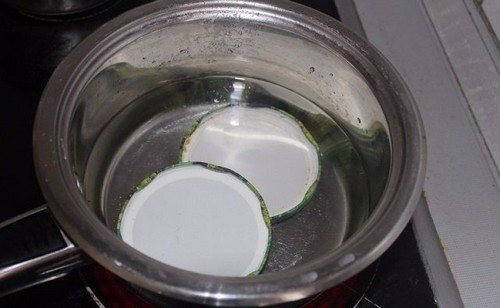
Pour water into the pan and place a wire rack on top. Turn on the device to maximum heat. Place the jar upside down.
During the boiling process, condensation will accumulate on the inside of the jar. As soon as it covers the entire surface, you can intercept the container. It must be placed upside down on a towel.
In a saucepan
Place a piece of cloth on the bottom of the pan (cotton is best). Place the jars in it with the neck down.
If everything doesn’t fit, you can move it horizontally.
Pour cold water so that the glass containers are completely immersed in it. Put the pan on the fire. Sterilize for 15 minutes.
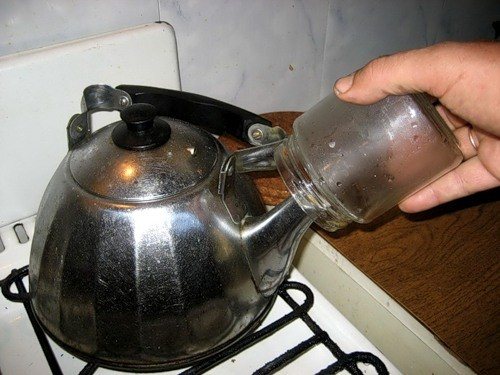
Above the teapot
This method is suitable when you need to sterilize a small number of jars. It is often used by summer residents. A kettle with a whistle is best suited for this procedure.
Pour water into the unit and let it heat up. We put a vessel on the spout. Option 2 - place a container on the hole for pouring water. During heating, it is better to hold the structure with a towel.
2-3 l. We sterilize jars for 15 minutes, and smaller containers for 10 minutes.
In potassium permanganate
We dilute potassium permanganate in water until a raspberry tint is obtained. Pour the solution into jars and add a glass of warm water (250 ml). Close the lid and leave for 10 minutes.
Turn it upside down and keep it for another 5 minutes.
Drain the potassium permanganate, rinse and scald the dishes with boiling water.
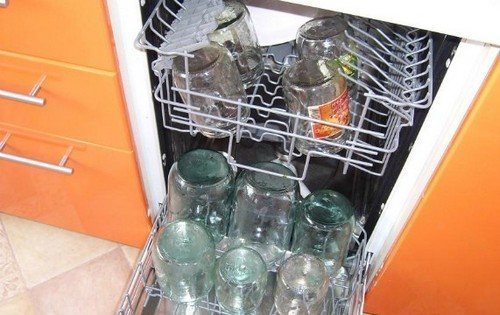
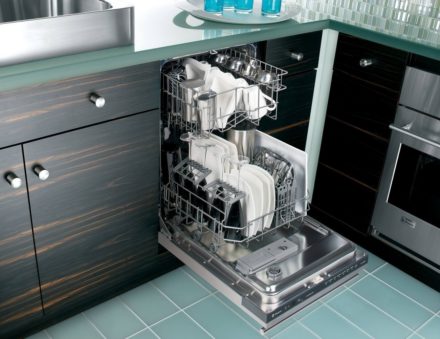
In the dishwasher
Dishwashers that heat water up to 100 degrees Celsius are suitable for sterilization.
Load containers into the unit. We select the program with the highest temperature and duration, or start “sterilization” if the dishwasher has such a function. No need to add any detergents. Click “Start”.
We take out the jars and dry them on a towel.
Chemical sterilization
Pour 100 ml of 95% ethyl alcohol into a clean jar and close the lid. Shake vigorously so that the liquid washes the entire inner surface. Pour the alcohol into the next container and close the sterile one with a tight lid.
Features of sterilization of jars for specific needs
Depending on the purpose for which the jars will be used, the nuances of sterilization are distinguished:
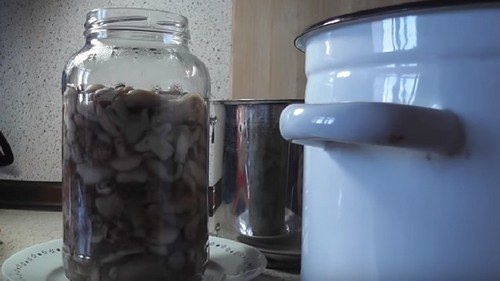
For yogurt
Almost all housewives do not sterilize containers for yogurt. There is no need to boil the container for a long time. It is enough to pour boiling water over it for 1-2 minutes, or cook in a saucepan.
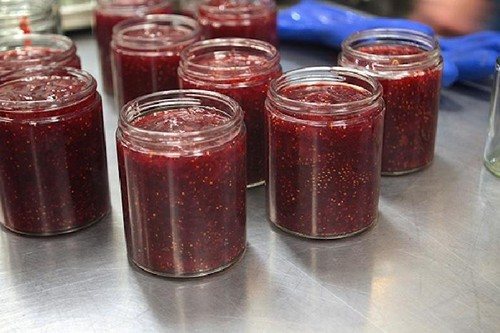
For jam
Wash containers for jam before sterilizing with a soda solution. Heating and cooling are carried out in an aqueous environment at a temperature of 60-80 degrees Celsius. It is better to take 1 liter jars.
Rinse with water adding 1 tsp. soda
If the jam is poured while boiling, the vessels do not need to be sterilized. Berries that are cooked for more than 2 hours are sterile. Their containers also do not need to be processed.
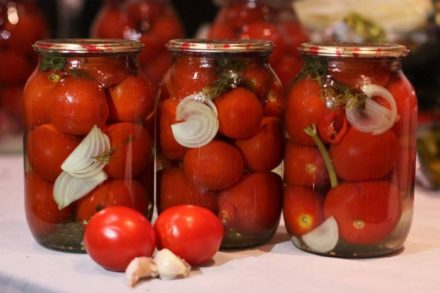
For cucumbers
The temperature for sterilizing cucumbers in a jar is 120 degrees Celsius. Immediately after the procedure, try to seal the product so that the brine retains its original properties.
For salads
Often, recipes for homemade salads indicate the sterilization time. It's better to stick to it. This will help preserve the workpieces for a long time.
To improve the process of warming up jars with twists, add 2-3 tsp into water. salt.
Hot salad should not be placed directly into containers. Wait for the mass to cool to 65 degrees Celsius.
For stew
The most suitable temperature for sterilizing meat products is 115 degrees Celsius.
If raw meat was used to prepare canned food, or you plan to store the product for more than 6 months, sterilize the homemade stew again along with the jar.
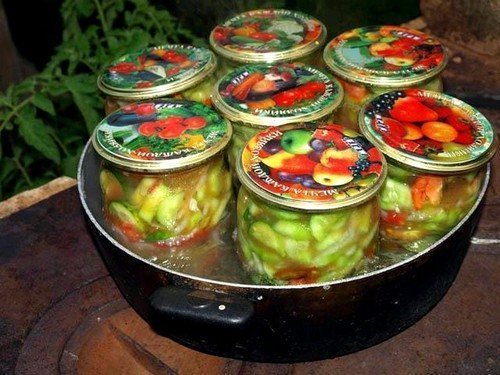
The process of sterilizing jars with blanks
Many recipes for blanks require sterilization along with filled jars. This option is most often used for preserving salads, stews, mushrooms, various types of adjika and vegetables.
There are two convenient ways.
The first one using a large capacity. Conducted in 10 stages:
- Place a piece of cotton or other natural fabric on the bottom of a pan or enamel bucket.
- We put jars of the same size. You cannot stack them on top of each other. We put the lids on top without twisting them.
- We put it on the stove.
- Pour water up to the neck of the jars.
- Turn on the unit at maximum power.
- Bring the water to a boil.
- 3 l. Boil the vessels for 30 minutes, 2 liters. - 20 minutes. If the volume is 1 liter. or less - boil everything for no more than 10 minutes.
- We take out the containers.
- Screw on the lids.
- Cover with a towel.
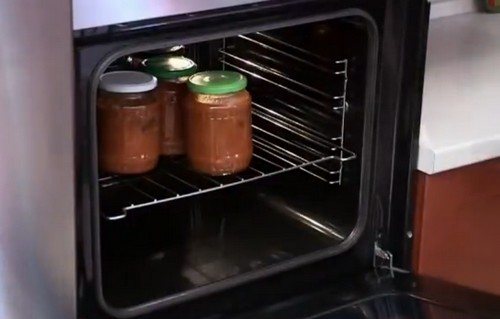
The second does not require a lot of water. It is shorter in duration. It is carried out in 6 stages:
- Pre-washed and filled with the finished product jars are covered with lids, without screwing them on.
- Put them in the oven on the grill.
- Close the unit.
- Heat the device gradually to 150 degrees.
- Leave it to sterilize for 10-15 minutes.
- Take it out with a warm towel or handles.
- Tighten the lids.
How quickly should a sterilized jar be used
After processing, the jars must be used within 48 hours. The main thing is not to touch them, especially the neck.
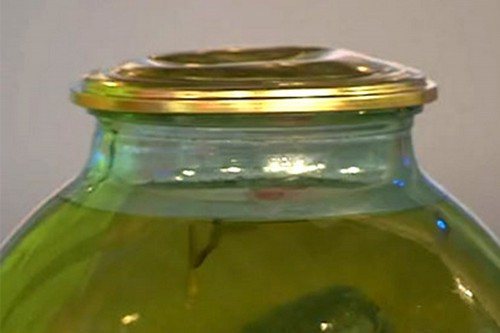
Do I need to sterilize the lids
Sterilization of the lids is an important step. Without it, microbes will begin to develop just like in an untreated jar.
Basic recommendations and instructions:
- The inner layer must be intact, without scratches or cracks. In 60% of cases, its damage is the cause of spoilage of the product.
- Use machine-screwed tin lids only once.
- If the lid was opened with a bottle opener or pried off with a knife, it will lose its original shape. It can no longer be used, since the seal is broken.
- For lids, the sterilization temperature is 100 degrees Celsius, and for rubber bands - 75 degrees.
- Screw caps can be used up to 10 times. More than this is not recommended.
Typical mistakes
Evidence of improper sterilization is swelling, tearing off of the lids.
It is important to remember that you cannot take out the jars after sterilization with a wet cloth. It is prohibited to put hot products in cold glass containers.
It is important to observe the sterilization temperature regime. Many housewives neglect this rule.As a result, the bacteria are not completely destroyed and continue to multiply. The product will deteriorate and characteristic swelling will appear on the lid.
The second reason for the development of bacteria is that the jars have been lying around for a long time after sterilization. It is necessary to remember the shelf life of disinfected containers.
Ripping off the lid is a rare but common occurrence. Occurs due to overheating of containers when the temperature exceeds 150 degrees Celsius. The glass jar bursts and scatters in all directions. You need to be very careful, it is dangerous for human life.
Additional recommendations
Finally, let's look at some important tips. If you follow them, you can be sure that the jars will be sterilized correctly. Here's what we recommend:
- Be sure to wash containers before sterilization. You can do this in the dishwasher without using detergent.
- Do not use commercial cleaning products to wash jars. They contain a large number of chemical components that are difficult to wash off with water.
- After washing, rinse 3 liters. water to remove chemical compounds that remain on the surface. First of all, clean the neck. Most often dirt and streaks of rust remain on it.
- If there are still drops of water in the container after sterilization, turn it over and leave it to dry.
- Use only a clean and dry towel. It is advisable to iron it on the front and back sides before use.
- Sterilize containers no earlier than 2 hours before rolling.
- Before sealing food, do not touch the neck of the jar so that microorganisms do not penetrate inside.
- After sterilization, wait until the jars are completely dry before adding food.
- You should not wipe the containers before putting in the products, as you risk introducing germs and bacteria.

Proper sterilization is the key to long-term storage of homemade products. If you choose any of the methods shown and follow the instructions, you can store the product for a year or more.


6 ways to use a pizza cutter for other purposes