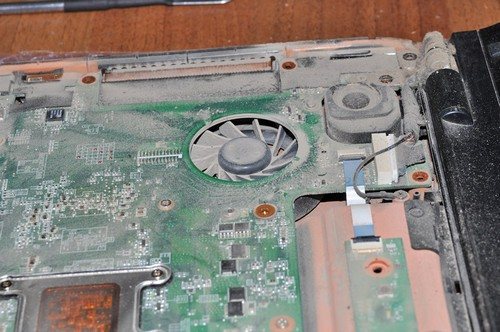
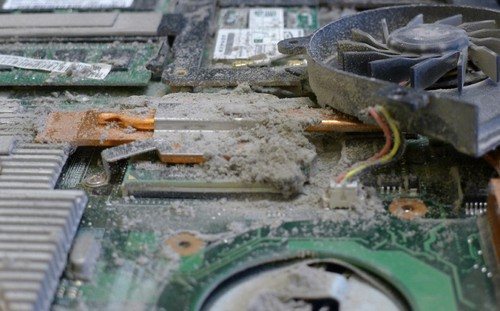
Like a personal computer, its portable counterpart is equipped with a ventilation system that protects the device from overheating. It is the cooling system that is the weak point of the laptop. Tiny debris and dust accumulate inside and penetrate far under the body. The rate at which dust accumulates will depend on the design and how carefully the user handled the laptop. The layer becomes thicker; As a result, it resembles felt, or “felt boots” in other words.
- Signs that cleaning is needed
- Possible consequences of heavy pollution
- Types of cleaning
- Tools
- How to clean your laptop from dust without disassembling it
- Complete cleaning at home
- Keyboard
- Connectors
- Opening the back cover
- Cooler and radiator
- Motherboard, video card
- Replacing thermal paste
- Reassembly
- Screen
- Features of laptops from various companies
- Cleaning in specialized service centers during the warranty period and the cost of the service
- How often is cleaning required?
- How to avoid frequent contamination
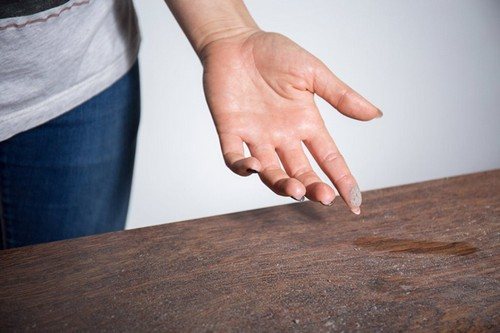
Signs that cleaning is needed
What happens to the PC:
- gets very hot;
- the processor makes noise that increases;
- the fan does not cope with its task;
- programs freeze;
- keys stick;
- switching on takes a long time;
- If the device overheats, it turns off unauthorized.
All of these things may indicate that your laptop needs cleaning. There are also programs for diagnosing temperature conditions.Indicators above 70 degrees are a sign of possible overheating due to contamination.
Possible consequences of heavy pollution
Over time, constant overheating of a laptop can lead to more problems than an emergency shutdown, including a failure of the cooling system, a radiator that has come unglued from the video processor, fire of microcircuits and the laptop itself.
Types of cleaning
There are two types - superficial and deep. When deep, the device must be disassembled, thoroughly wipe all parts, completely removing dirt.
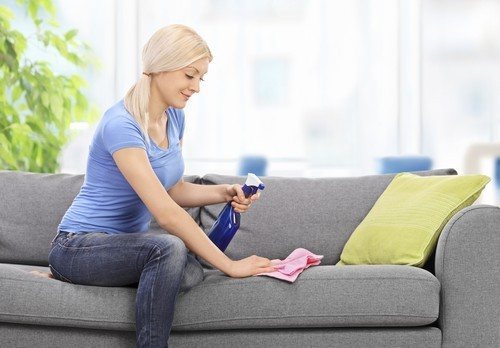
Superficial implies external care of the laptop. Keyboard on the outside, monitor, blowing dust through the fan and radiator grille. This type of cleaning is mostly preventative. The device will remain in service longer. Superficial “cleaning” is important not only for aesthetics, but for the user’s health, because a huge number of microbes accumulate on the keyboard.
If there are all signs of serious contamination on the face, complete cleaning cannot be avoided. It's easier to spend time removing dirt than to pay for repairs.
Tools
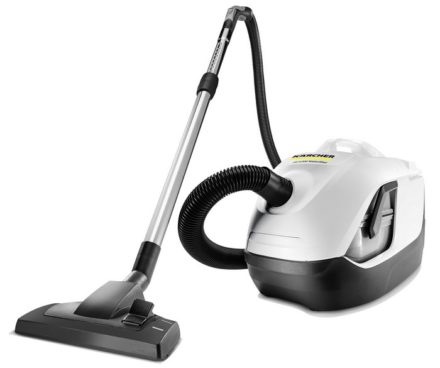
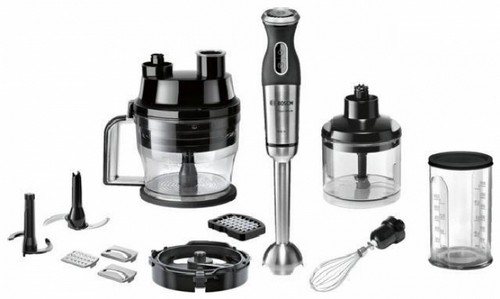
What tools to choose when preparing for “spring cleaning”:
- Vacuum cleaner/hair dryer for sucking/blowing dust. If the vacuum cleaner has both functions, you can only use it.
- A can of compressed air. The aerosol performs the same function as a hair dryer.
- Soft brushes, small brushes for cleaning the keyboard and other parts. For the same purpose, you can use cotton swabs or swabs.
- Microfiber cloth for wiping.
- Screwdriver Set. Screwdrivers of different diameters will be needed during disassembly.
- Machine oil for lubricating the cooler.
- Isopropyl alcohol for cleaning microcircuits.
- Pliers.Special pliers are used to remove the screen.
- Thermal paste. After cleaning the parts, you will need to replace the thermal paste to better cool the computer.
How to clean your laptop from dust without disassembling it
Superficial “cleaning” without disassembly is a fairly simple procedure that can be easily done at home. To get rid of dirt, you can arm yourself with a vacuum cleaner, hair dryer or spray can. Special cleaning wipes won't hurt.
The ventilation grilles are located on the bottom, they suck air inside, there is another grille on the side, from where the air is blown out. These are the places that need to be cleaned first.
If the device becomes too dusty and has not been cleaned for more than three years, it is dangerous to clean it superficially, since a large amount of dense dust will settle on the fan, rendering it inoperable.
Before “blowing out” the laptop computer, you can clean the ventilation grilles with cotton swabs.
Procedure:
- Turn off the laptop.
- Place it edge-on, like a book.
- Place the vacuum cleaner one at a time on the ventilation grilles, holding each for about 2 minutes.
- Repeat the procedure with a hairdryer near the radiator.
- Go through the vacuum cleaner again.
Due to the long thin spout, the can is well suited for the inlet ventilation hole. Just insert the spout inside. The air will “start” the fan, blowing debris away from it. How to do this using an aerosol:
- Turn off the laptop.
- Place it edgewise.
- Blow out the outlet ventilation grilles.
- Return the device to its normal position.
- Blow out the inlets.
- Blow out debris between the keys.
- To consolidate the effect, you can use a vacuum cleaner.
All that remains is “cosmetic” beauty – tidying up the display and keys. The benefits of such events are purely individual, determined by the design of the laptop.
Complete cleaning at home
When starting “spring cleaning”, it is important to have at least basic disassembly skills. It is necessary to clean the case, motherboard, radiator, processor, video card. If the user is not sure that nothing will be damaged, it is better to entrust the task to specialists.
Before the cleaning procedure, any equipment must be completely de-energized. To do this, you need to shut down the work, disconnect the laptop from the network, and remove the battery. Otherwise, you risk injuring yourself and damaging the device.
If the user is not very experienced in disassembly, then it is worth filming the process. With the help of photographs, the reassembly process will go faster; the main thing is not to skip any steps when taking photographs. It’s worth looking online for a video with the design features of the same model in order to do everything correctly and not damage anything.
Keyboard
The keyboard is almost the dirtiest item in the house, so you should start with it. If it is not very dirty, it is enough to wipe it from the outside. To do this, you can use cleaning wipes for equipment. You can replace them with regular cloth and soap; they will cope just as well with dirty prints.
- Dampen the cloth and squeeze to prevent water from running off.
- Lather lightly.
- Wipe the keys, removing external dirt.
- Dampen a clean cloth and wring it out.
- Wipe again to remove soap.
- Wipe dry with a napkin.
Instead of soap, you can use cleaning products or diluted alcohol, as long as it does not damage the key markings. Such products can erase the paint.If this trouble does happen, special stickers will come to the rescue.
If the keys are too dirty, you can remove them with a knife, soak them in water with detergent. To arrange them correctly after drying, you can take a picture of the keyboard.
To clean the keyboard inside, you need to carefully remove it from the case so as not to damage the cable. This advice applies to all other manipulations, since this is not the only cable in the design.
Connectors
USB and other connectors also get dirty, which can cause interruptions in the connection of the mouse, phone, flash cards. A brush with long bristles is suitable for cleaning. If the connector is narrow and it does not fit through, you can cut a narrow strip from an unnecessary plastic card to the size of the port, glue it with Velcro. You need to moisten the brush or Velcro in alcohol, let it dry. Using light movements, without effort, clean the connectors from dirt. Then blow out the ports with a can of compressed air.
Opening the back cover
You need to turn the laptop over. To get to the parts that need cleaning, you need to unscrew the bolts holding the back panel. The unscrewed bolts should be placed in a prepared container or bag so that they do not get lost. Do not open the cover by force, if it does not give in, it is better to double-check that all the bolts are unscrewed. After removing the panel, wipe it from the inside with a napkin.
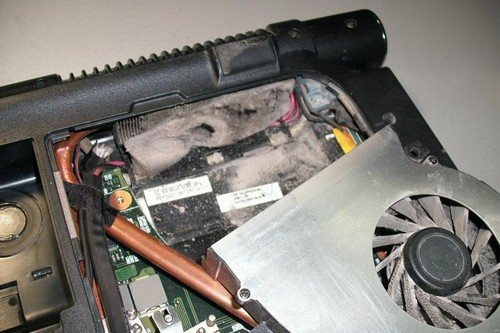
Cooler and radiator
After unscrewing the screws that hold the fan, put them in another place so that they do not get tangled with the rest. After pulling out the fan, wipe the blades with a brush or cotton swabs, blow with air. If the fan does not spin well, lubricate the rotor with machine oil. One drop inside is enough.Then return the fan to its place by turning it.
Pay special attention to the radiator, which is the largest accumulation of dust. It should be thoroughly cleaned to remove any remaining thermal paste.
Motherboard, video card
Having pulled the motherboard out of the case, we can consider that half the job is done. Proceed with extreme caution as this is the most fragile part of the laptop. Walk over the surface with a soft brush slightly moistened with alcohol and use a spray can or hairdryer to blow off all the microcircuits, not missing a single dusty contact.
The video processor should be removed from the slot carefully. Pull the socket pedal to the side and lift it up. When the pedal is in a vertical position, take the processor by the sides and remove it from the socket. Wipe the contacts with a regular eraser or an ear stick soaked in alcohol.
Replacing thermal paste
A complete disassembly of the cooling system involves replacing the thermal paste. First, use a dry cloth to remove any remaining old thermal paste. If the paste is dry, you can moisten a cloth with alcohol. Do not leave scratches on the surface of the processor and heatsink.
Before applying the composition, you need to make sure that the surfaces are clean and shiny. Apply thermal paste in small quantities, carefully spreading it over the heatsink plate and video card with your finger or a spatula, which is usually included with the thermal paste.
Reassembly
Return the video card to the connector, pressing it with your finger, and tighten the bolts. It is necessary to hold it with your finger so that no air bubbles form under it. Replace the remaining parts using the photographs taken.
Screen
Under no circumstances should the display be wiped with alcohol-containing compounds, as this will damage the screen.For gentle cleaning, you should choose wipes for LCD surfaces or sprays for TVs. Apply a small amount of spray to the display and rub with a napkin, leaving no streaks.
Features of laptops from various companies
The process of cleaning models from different manufacturers is almost identical, only the process of removing the back cover and removing the cooler and radiator changes.
Lenovo and Aser laptops have a simple design. It is enough to remove the battery, remove the cover above the fan by unscrewing the bolts.
Lenovo has developed the Lenovo Energy Management program, which, in the “Dust Removal” mode, speeds up the fan and helps get rid of debris. An analogue of the program from Hewlett Packard is HP CoolSense. The technology determines on what surface the device is used, selecting the appropriate performance mode and cooling system.
The Asus Eee PC will literally have to be disassembled piece by piece, because access to the cooler is difficult, like many Hewlett Packard models.
When disassembling Samsung and Asus K, the entire back panel and sometimes the keyboard are removed.
Cleaning in specialized service centers during the warranty period and the cost of the service
To clean the cooler, you can use the services of a service center. This is not included in the service, which is clearly stated in the warranty card of any manufacturer, i.e. the service will be paid.
Once the laptop has been disassembled and cleaned at home, the warranty is no longer valid. At the center, this will be recognized by a damaged seal and scratched screws.
You can clean your laptop in any repair shop in an hour. Prices on average range from 500 to 2000 rubles.
How often is cleaning required?
The best time to do the first cleaning is after the warranty has expired.Acer, Asus, Samsung, HP, IBM, Lenovo recommend cleaning at least once a year. More expensive models from SONY, HP and Asus will require attention after two years. Apple will work without interruptions for up to three years. In many ways, the frequency of cleaning depends on the operating conditions. When using a laptop on a hard surface in a clean room, cleaning will be needed later. On average, the device needs to be cleaned once a year and a half.
How to avoid frequent contamination
In order not to constantly blow dust out of the device, it is enough to arm yourself with simple tips:
- Use the laptop on a hard surface. By placing the computer on your lap or bed, the user blocks the air supply and small debris is sucked in.
- Do not snack while working at the computer. Crumbs will get inside. And overturned tea or coffee will completely kill the device.
- When you finish working, the laptop should be turned off so that it does not work idle.
- A USB cooler will provide an additional cooling effect, but will not help to avoid dust.
A laptop is a powerful portable computer, and its cleanliness is the key to the safety and reliability of the device.